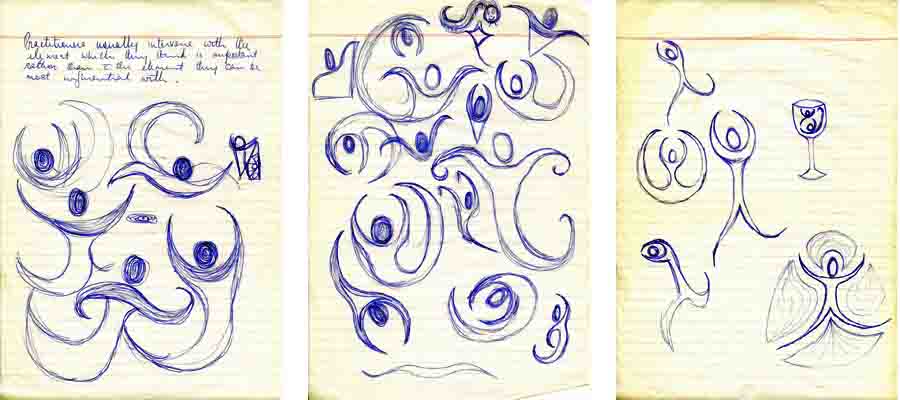
I was at a Professional Development Workshop somewhere, sometime. Alas there’s no record of the topic but perhaps it was getting late in the day and my attention was wandering. It’s said that women who knit in church hear more of the sermon than those who sit dutifully ‘listening’. Likewise she who doodles in a professional workshop. It might have been a long afternoon by the looks.
But I’d learned before that doodles can be a good beginning to new designs and so it was for these very energetic and gymnastic mermaids. Time to get out the graph paper and to think about the shape and dimensions of the garment I wanted. I also needed to think about the yarns, colourways and techniques that would translate my mermaid doodles into pleasing items.
The yarns were no problem. The mermaids themselves would be knitted with the shiny knitted ribbon yarns that I’d picked up wherever I could. The backgrounds would also be done in intarsia [picture knitting] with different coloured and textured yarns in random shapes to provide contexts for the mermaids.
Now because mermaids are ethereal creatures, not easily visible nor believable to all, I decided that they would blend into the backgrounds of the garments so they might be noticed by only the most careful observers. I decided too that I’d only put them on the backs of the garments – this way the wearers too might forget they were there from time to time.
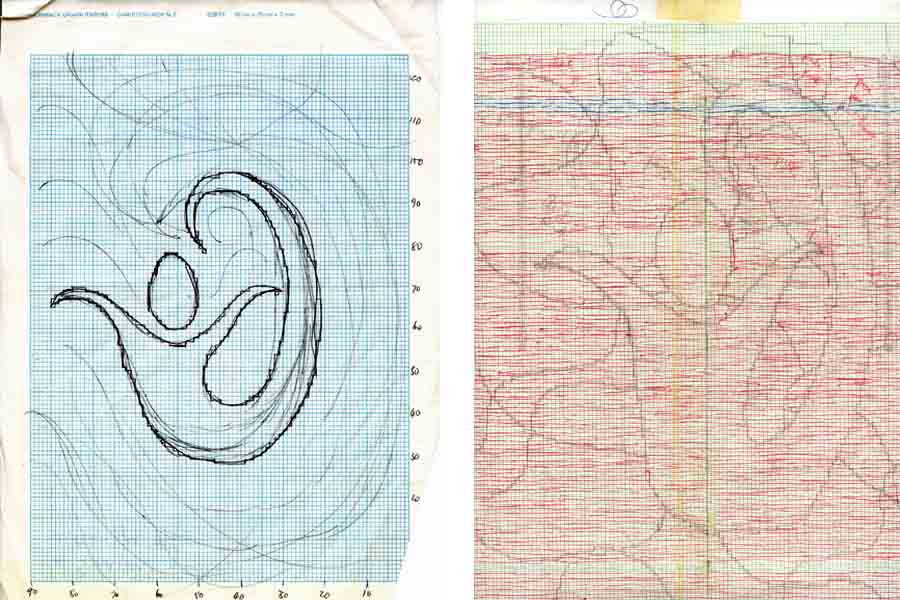
These seem to be the only sketches that survived the next phase of the planning. The sketch on the left is just that – a sketch. It was a shape that pleased and once I had the shape I wanted I translated the smooth lines into stitch shapes as close to the original outline as I could.
Important tip time:
When transferring a design onto graph paper the idea is that each small square unit represents one stitch. Knitted stitches are rarely square, especially those in stocking stitch, the most common technique used in intarsia. These stitches are noticeably wider than they are long – a fact that needs to be taken into account when doing the original sketches. My ‘finished’ mermaid’s shape would be a little fuller than pictured here. It is possible to get software and/or graph paper for knitters in which the ‘squares’ have the same dimensions as your stitches. Worth a Google if you’re using this approach often.
In the sketch on the right there are several things to notice. That’s been made a little more difficult by the red lines that I’ve drawn through each row of stitches as I kept track of where I was in the knitting process. But if you look carefully through the red hatched lines, the mermaid is there and the background has been sketched into discreet shapes. Right at the top of this ‘page’ you might see the stepped lines of the shoulders and the back of the neck.
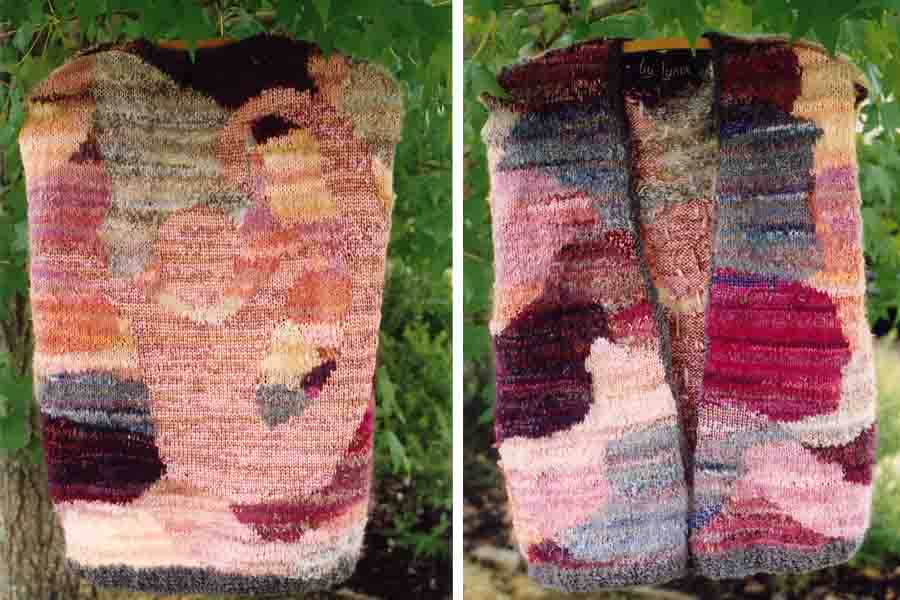
The finished product – back and front. Much appreciated by she who bought it.
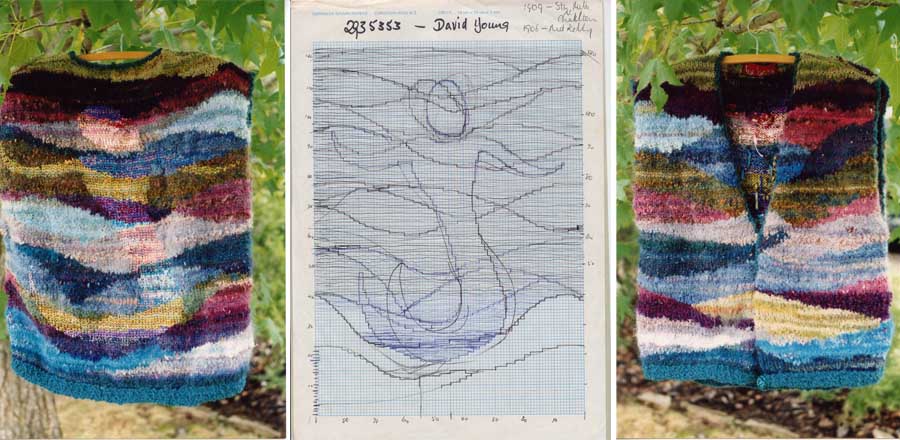
It was time to start on the next one. But in this next one the mermaid was even more elusive. She was still knitted in the rayon ribbons but this time they matched the colour of the background at that particular intarsia section. Notice on the sketch that at some point I’ve changed the angle of the head and the tail. There’s a lot of time to contemplate such things while knitting slowly. Time too to listen to the radio – David Young was the gardening expert on the local ABC station – I must have had a question to put to him.
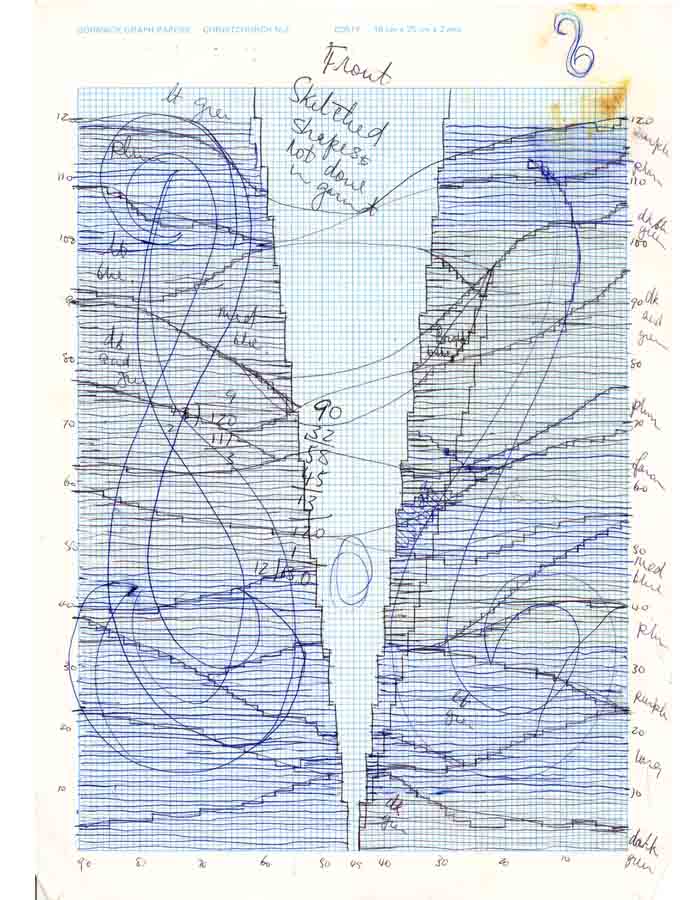
Now I’ve just found the graphing for the front of this second project. It gives me a chance to explain how I work out the overall schema, number of stitches needed etc for a project.
The shape of the garment is simple. Together the fronts form a deep V from the shoulders to the hipline. The sides are straight.
Along the bottom of the graph the stitches are numbered from right to left [90sts] – vertically the rows are numbered from the hip to the shoulder [120 rows]. Previously I’d done a sample/tension square and worked out how many stitches and rows I needed for the measurements.
There are some shapes sketched on each of the fronts. As the note at the top says these shapes were not used. There are notes up the side and on the fronts about the colourways I was using. The dark green section lower right was done with a mix of several different yarns of different textures that I had in my dark green collection for example. When planning these garments I kept an eye out for odd balls of yarn that fitted the colourways I had in mind. I knitted with short lengths of each yarn blending the yarns together to produce a pleasing fabric.
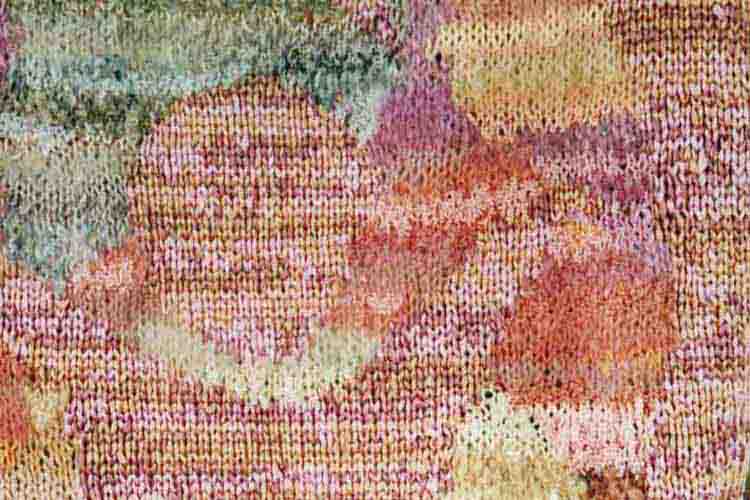
This segment of the first Mermaid project shows small sections of the background colour blocks and the head, upper torso and arms of the mermaid. The fawnish section in the upper left corner shows the mix of boucles, smooth yarns and mohairs I used. Likewise the lighter and darker apricot blocks towards the right side. There were four or five different rayon ribbon yarns that I used for the mermaid – two together at any one time as though they were one. I’d start with two of different lengths – when the shorter one was nearly done I’d cut another length of one of the other colours then knit the three together as though they were one for three or four stitches before the shortest one was done. The differences even out fairly quickly, and if they are apparent it’s amazing how quickly the joins just become part of the varied texture.
There’ll be other examples of this technique of making new fabrics from lots of different yarns elsewhere on this site in time. I’ll add a link here when it’s done.
